 ) in the Layer Legend. All data available in AccuMap can be displayed in the DataCard and the DataCard can be used both to view and process data as well as to launch specialized dialog boxes to work with data.
 The DataCard is a dialog box that appears when you click an item on a map layer that has been made inspectable () in the Layer Legend. All data available in AccuMap can be displayed in the DataCard and the DataCard can be used both to view and process data as well as to launch specialized dialog boxes to work with data.
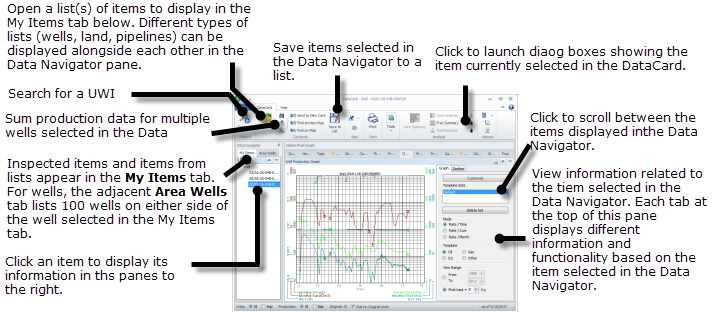
Click for definitions of the various data fields that appear in the DataCard.
) in the Layer Legend for the layer(s) to inspect and with Inspect mode ( ) enabled in the Navigation tab, hover the cursor over the desired item and ensure the information that appears in the Inspect tooltip is for the desired item, and then click the item to display it in a DataCard, or right-click it and select an option from the context menu.
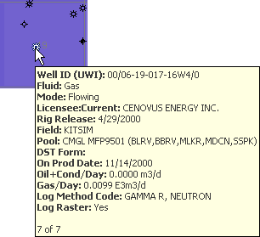
Where the map layer that contains the item to display in the DataCard is overlain by another map layer, and that layer prevents you from displaying the desired item in the DataCard, you can either disable Inspectability in the Layer Legend for the obscuring layer ( ), or press the SPACEBAR to scroll through layers until information for the desired item appears in the Inspect tooltip, and then click to display details for that item in the DataCard. For example, below the Wells layer is covered by the Pool layer, which overlaps with seven other pools, and the Inspect tooltip indicates so. To display the well in the DataCard, simply press SPACEBAR to scroll through each of the overlapping pools until the well summary appears in the Inspect tooltip and then click.
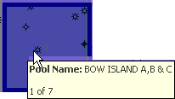
 and
and  to expand and contract groups. For wells, you can select multiple individual items and then click Group Wells (
 ) to sum the production information for the selected wells.
Where data isn't available for a given tab, the following appears on the tab:  . Where you're not licensed for a type of data, the following appears on the tab:
 ) to add items to the My Items tab of the DataCard based on the results in a list. Items selected in the My Items pane can be saved to a list by clicking Save to List (
 ).
). ) to display the selected item(s) in a new DataCard, or click Send to New Map (
 ) to launch a new map centered on the selected items. For Land DataCards, you can paste the copied item into another group that appears in the Data Navigator pane. For example, you might open a land list in the DataCard and then paste the data item's ID in various nodes that already appear in the DataCard.
 ) to display the Quick Search dialog box where you select a data type, area, and then type the ID of items to add to either a new or existing DataCard and click Search. Select the item(s) from the results (Ctrl+Click or Shift+Click for multiple selection), and then click either Add to New DataCard or Add to DataCard depending on whether to launch a new DataCard or to add the item(s) to the bottom of a data type group (Well, Pipeline, Facility, etc.) of the Data Navigator pane in the current DataCard. Note that an item can only be added to the same DataCard once.
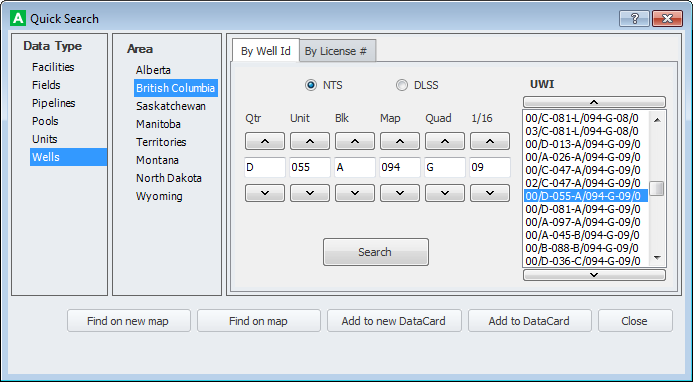
 , land DataCards) (
 , all other DataCards) that appears in the top-right corner of various panes in the DataCard to expand the information in that pane to fill the entire DataCard.
 ) in the top-right of a given tab to print a report showing the data in the current tab.
 .
.  ) to configure the data types and data fields to include in printed reports.
 ) to hover the cursor over the surface location of the map item (well, facility, land parcel, etc.) that was last loaded into the DataCard. Click the drop-down list below the Continue option to specify whether to close the DataCard when returning to the map.
For additional functionality including configuring DataCards, plotting production declines, and printing reports, see Related Topics below.